Last spring, my mother came to visit for the holidays. She’s in her seventies, sharp as a tack, but her knees aren’t what they used to be. Watching her navigate the three steps up to my front porch — gripping the wall, moving slowly, visibly nervous — hit me harder than I expected. I had always meant to install a proper railing. I just never got around to it.
That weekend, I got around to it.
What followed was a weeks-long deep dive into the world of railing kits for outdoor steps — and honestly, I had no idea how much there was to learn. Material choices, weight ratings, installation methods, code requirements, accessibility needs… It’s a lot more nuanced than it looks. But I came out the other side with a beautiful, sturdy railing and a whole lot of knowledge I wish I’d had going in.
This guide is everything I learned, organized so you don’t have to go through the same rabbit hole I did.
Why Your Outdoor Steps Need a Proper Railing
Let me start with the obvious: railings save lives. Falls on steps are one of the leading causes of home injuries, especially for children and older adults. But beyond safety, a well-chosen railing does something else entirely — it finishes your home’s exterior. It signals care and attention. It adds value.
Here’s what a quality railing kit for outdoor steps actually gives you:
- Safety for every family member — from toddlers to grandparents
- Compliance with local building codes (most jurisdictions require railings for steps with more than two risers)
- Curb appeal — a sleek railing upgrades the look of your entire entrance
- Resale value — buyers notice the details, and a solid railing is a reassuring one
- Peace of mind — simple as that
With that established, let’s talk about how to actually choose the right one.
Step 1: Know Your Material Options
The single biggest decision you’ll make is what material your railing is made from. Each has real trade-offs, and the right choice depends on your climate, budget, aesthetic preferences, and how hands-on you want to be with maintenance.
Aluminum Handrails for Outdoor Steps
If I had to recommend one material to most homeowners, it would be aluminum handrails for outdoor steps — and here’s why.
Aluminum is:
- Rust-proof and corrosion-resistant — unlike steel or iron, it won’t deteriorate when exposed to rain, humidity, or salt air
- Lightweight — easier to handle during installation, especially if you’re doing it yourself
- Low maintenance — no painting, no sealing, no annual upkeep
- Surprisingly strong — modern aluminum alloys are more than capable of handling heavy loads
- Versatile in style — available in powder-coated finishes that can mimic wood, iron, or any color you choose
PMFII’s aluminum railing kits for outdoor steps are a fantastic example of what this material can do when engineered properly. The finish options are impressive, and the pre-drilled, pre-cut kit design makes installation genuinely manageable for a confident DIYer.
If you live in a coastal area, a wet climate, or simply want something that will look great with zero fuss for the next 20 years, aluminum is your answer.
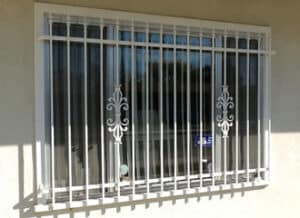
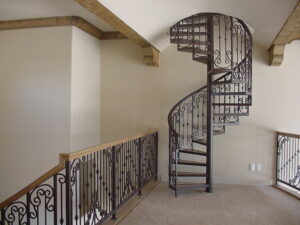
Steel and Wrought Iron
For those who want maximum weight and a more traditional, ornate look, steel and wrought iron railings are worth considering. They’re heavier, more rigid, and have an undeniable visual presence. The trade-off is maintenance — they need to be properly coated and periodically touched up to prevent rust.
Wood
Wood railings are warm, classic, and often the easiest to DIY from raw materials. But outdoors, wood is fighting a constant battle against moisture, rot, and pests. Unless you’re committed to regular maintenance (sanding, sealing, painting), wood tends to look tired within a few years.
Composite / PVC
A newer option, composite railings give you the look of wood without the maintenance headaches. They’re durable, weather-resistant, and come in a variety of styles. Great if you love the wood aesthetic but don’t want the upkeep.
Step 2: Consider Who’s Using the Steps
This is the question I should have been asking from day one — before my mother’s visit made it uncomfortably obvious.
Think honestly about everyone who uses your outdoor steps:
- Young children need closer rail spacing and a lower graspable height
- Older adults need continuous, graspable rails at a consistent height (typically 34–38 inches)
- People with mobility challenges may need rails on both sides of the steps
- Frequent heavy traffic commercial-grade weight ratings matter more
Handicap Handrails for Outdoor Steps
This deserves its own conversation. Handicap handrails for outdoor steps aren’t just a “nice to have” — for many households, they’re essential. And in many jurisdictions, if you’re doing any kind of permitted renovation, ADA-compliant handrails may be legally required.
What makes a handrail ADA-compliant for outdoor use?
- Height: Between 34 and 38 inches above the stair nosing
- Graspability: The rail must be grippable — typically 1.25 to 2 inches in diameter for round rails
- Extension: The rail should extend at least 12 inches beyond the top riser and one full tread depth beyond the bottom riser
- Continuous surface: No gaps, interruptions, or decorative elements that break the grip
- Secure anchoring: Must withstand 200 lbs of force in any direction
PMFII offers specific railing kits designed with these accessibility standards in mind — which is something I genuinely appreciate. It means you’re not guessing about whether your installation is compliant. The specs are built in.
Even if no one in your household currently has mobility challenges, installing accessible handrails is a forward-thinking choice. It makes your home safer, more welcoming, and more adaptable as your family’s needs change.
Step 3: Measure Your Steps Correctly
This is where a lot of DIYers go wrong, and it’s an easy mistake to avoid with a little preparation.
Before you buy anything, gather these measurements:
Total Rise: The vertical height from the bottom of the first step to the top of the last step. This determines how tall your posts need to be.
Total Run: The horizontal distance from the front edge of the bottom step to the back edge of the top step. This tells you how long your rail needs to be.
Number of Steps: Simple, but important — some kits are rated for specific step counts.
Step Width: If you want railings on both sides (which I strongly recommend for accessibility), the width determines how your posts will be positioned.
Existing Surface Material: Concrete, wood decking, brick, or stone — each requires a different anchoring method. Make sure the kit you choose is compatible.
Write all of this down before you go shopping. Trust me.
Step 4: Understand Installation — DIY vs. Professional
One of the most common questions I get asked is: Can I really install a railing kit myself?
The honest answer: it depends on the kit and your comfort level.
A well-designed railing kit — like those from PMFII — is specifically engineered to make installation accessible to homeowners. The components are pre-cut, pre-drilled, and come with clear instructions. If you’re reasonably handy and comfortable with a drill and a level, you can absolutely do this yourself over a weekend.
How to Make a Handrail for Outdoor Steps (the DIY Approach)
If you’re working from a kit, here’s the general process — and understanding it helps you shop smarter:
- Mark your post locations based on your step measurements. Posts typically go at the top and bottom of the run, with intermediate posts every 4–6 feet for longer runs.
- Anchor the posts. For concrete steps, this usually means drilling into the concrete and using expansion anchors or epoxy. For wood steps, lag screws into the structural framing are common. This is the most critical step — a poorly anchored post is a dangerous post.
- Set the rail angle. Outdoor stair railings are angled to follow the pitch of the steps. Good kits include adjustable brackets that let you set this angle without custom cutting.
- Install balusters or infill panels. These go between the top rail and bottom rail (or between the rail and the step surface), filling the space for safety and aesthetics.
- Attach the handrail. The graspable rail goes on top, secured to the posts or to the baluster assembly.
- Check everything with a level and test the load. Push, pull, shake. A finished railing should feel absolutely solid.
If any of these steps feel outside your comfort zone — especially the anchoring into concrete — there’s no shame in calling a professional. A poorly installed railing is worse than no railing at all.
When to Hire a Pro
- You’re working with masonry that’s old, cracked, or uncertain
- You need a permit pulled (some jurisdictions require licensed installation)
- You’re installing on both sides of wide steps with multiple posts
- The steps themselves are irregular or non-standard
Step 5: Think About Style
I know, I know — we’ve been talking about safety and measurements and compliance. But style matters too. Your railing is one of the first things people see when they approach your home, and it should complement your house, not fight it.
A few guiding principles:
Match your home’s architectural style. Clean-lined aluminum profiles look sharp on modern and contemporary homes. Ornate iron-inspired designs suit traditional, Victorian, or craftsman styles. Simple round-rail systems work almost everywhere.
Consider your front door and other hardware. If your front door hardware is matte black, a powder-coated black railing creates a cohesive look. If it’s brushed nickel or bronze, carry that through to your rail finish.
Don’t forget the color of your steps and facade. A white railing on grey concrete steps looks crisp and classic. A dark bronze railing on brick steps looks rich and intentional.
PMFII’s product range covers a wide enough variety of finishes and profiles that you can almost always find something that feels tailor-made for your home — even though it’s coming from a kit.
Step 6: Don’t Ignore Weather and Climate
Your railing will be outside, every single day, through rain, snow, UV exposure, humidity, and temperature swings. Material selection (covered above) is a big part of this, but so is finish quality.
Look for:
- Powder-coated finishes over painted ones — powder coating is thicker, more durable, and far more resistant to chipping and fading
- UV-stabilized materials if you live somewhere with intense sun
- Stainless steel hardware for any fasteners — even on aluminum railings, cheap steel screws will rust and stain
- Proper drainage design — posts that trap water will fail faster; look for designs that shed moisture
Why I Recommend PMFII Railing Kits
After all my research and my own installation experience, I kept coming back to PMFII as the brand that genuinely gets it right.
Here’s what stood out:
- Engineering quality: These aren’t flimsy, undersized components. The wall thicknesses, load ratings, and anchoring hardware are built for real-world outdoor conditions.
- Accessibility focus: PMFII offers dedicated handicap handrail options that meet accessibility standards out of the box — no guesswork required.
- Aluminum-first design philosophy: Their aluminum handrail systems are engineered specifically for outdoor use, which means the corrosion resistance isn’t an afterthought — it’s the foundation.
- Complete kits: Everything you need comes in the box. No hunting for compatible components from three different suppliers.
- Clear installation guidance: The documentation is genuinely helpful — not the cryptic diagram-only sheets you sometimes get with cheaper kits.
Whether you’re a first-time DIYer or a seasoned weekend warrior, PMFII makes the process manageable and the result professional.
My Final Checklist Before You Buy
Use this before you place any order:
- Measured total rise, total run, and step width ✔
- Identified the surface material (concrete, wood, brick) ✔
- Confirmed whether permits are needed in your area ✔
- Consider the needs of all users, including older adults and anyone with mobility challenges ✔
- Choose a material that suits your climate (aluminum is highly recommended for most) ✔
- Matched the railing style to your home’s aesthetic ✔
- Verified the kit includes ADA-compliant options if needed ✔
- Checked that all hardware is weatherproof ✔
- Decided whether this is a DIY project or one for a pro ✔
The Bottom Line
Choosing the right railing kit for outdoor steps is one of those home improvements that pays dividends every single day — in safety, in confidence, and in how your home presents itself to the world. It doesn’t have to be complicated, but it does deserve careful thought.
Start with the right material (aluminum is hard to beat for most homeowners). Measure carefully. Think about who uses your steps and whether accessibility features matter. Choose a style that complements your home. And work with a brand like PMFII that builds kits designed to actually perform outdoors, season after season.
My mother visited again recently. She walked right up those steps — one hand on the rail, head up, no hesitation.
That’s what a good railing does.